Scrapbooking layout for 123 Get Scrappy April: Be You. Always.

Hi!

April challenge in 123 Get Scrappy was revealed some days back, and the layouts linked to the challenge look amazing! There's still a few days left to play, so here's the grid for you:


I chose the top row, and here's what I came up with:

Scrapbooking layout for 123 Get Scrappy April challenge

The photo strip was taken with my iPad, using the 'Pocket Booth' application. That app is so fun and simple to use, and playing with it reminds me of the teenage days when we took pictures of us friends together in a photo booth.  Oh, how time flies! :D


For the 'Frame' element I chose a cork circle sticker. Cork is a popular material in paper crafting embellishment sets, and I think it will continue to be popular; I love the softness of it!

Scrapbookin layout, close-up


Before gluing down the picture strip and the sentiment texts I white washed the background paper with white gesso. Once dry I used a little bit of gel medium to glue down the piece of mesh I had randomly cut on the other edge.


Then added a few wooden embellishments, text strips, and some dots of black acrylic paint. Done!
The texts are cut from 'Be You, Subway Art' paper by Fancy Pants.

Scrapbookin layout, close-up


I hope you got inspired by our grid and will play along. Challenge info and linky tool can be accessed via this link.

I hope your week has started well. Hugs,

post signature

Catching up on 12 Tags of 2015: February


Hi!
This year I was too busy to make the first tags in '12 Tags of 2015' on schedule, but I'm catching up! I'm planning to make the January tag this weekend, and in the meanwhile I'm sharing with you my February tag I finished some days ago:


The background collage is made from papers I had in my scrap paper box. Whitewashing the background with gesso and highlighting the edges with Distress markers and a bit of water was a great detail! And doesn't Tim always emphasize in his tutorials: 'It's all in the details', lol!


February theme was Valentine's, and I thought that the happy couple was a perfect match for the die-cut felt heart. The picture is from Tim Holtz Idea-ology Found Relatives card set. I did not use the entire card but fussy cut the playful couple around the edges.


I also liked the fact that the February tutorial suggested to take out the sewing machine and to decorate the tag with a few stitches. That's something I like but really do too seldom!


For reading the full tutorial by Tim Holtz please follow this link


This is already my 3rd year that I'm following the monthly tag tutorials. I have not made them all, but still the majority since January 2013. In Pinterest I collected all my '12 Tags of...' projects in one board, follow this link to see the entire gallery!


I'm wishing you a great weekend. Do you have some crafty plans for the coming days?

Hugs,
post signature

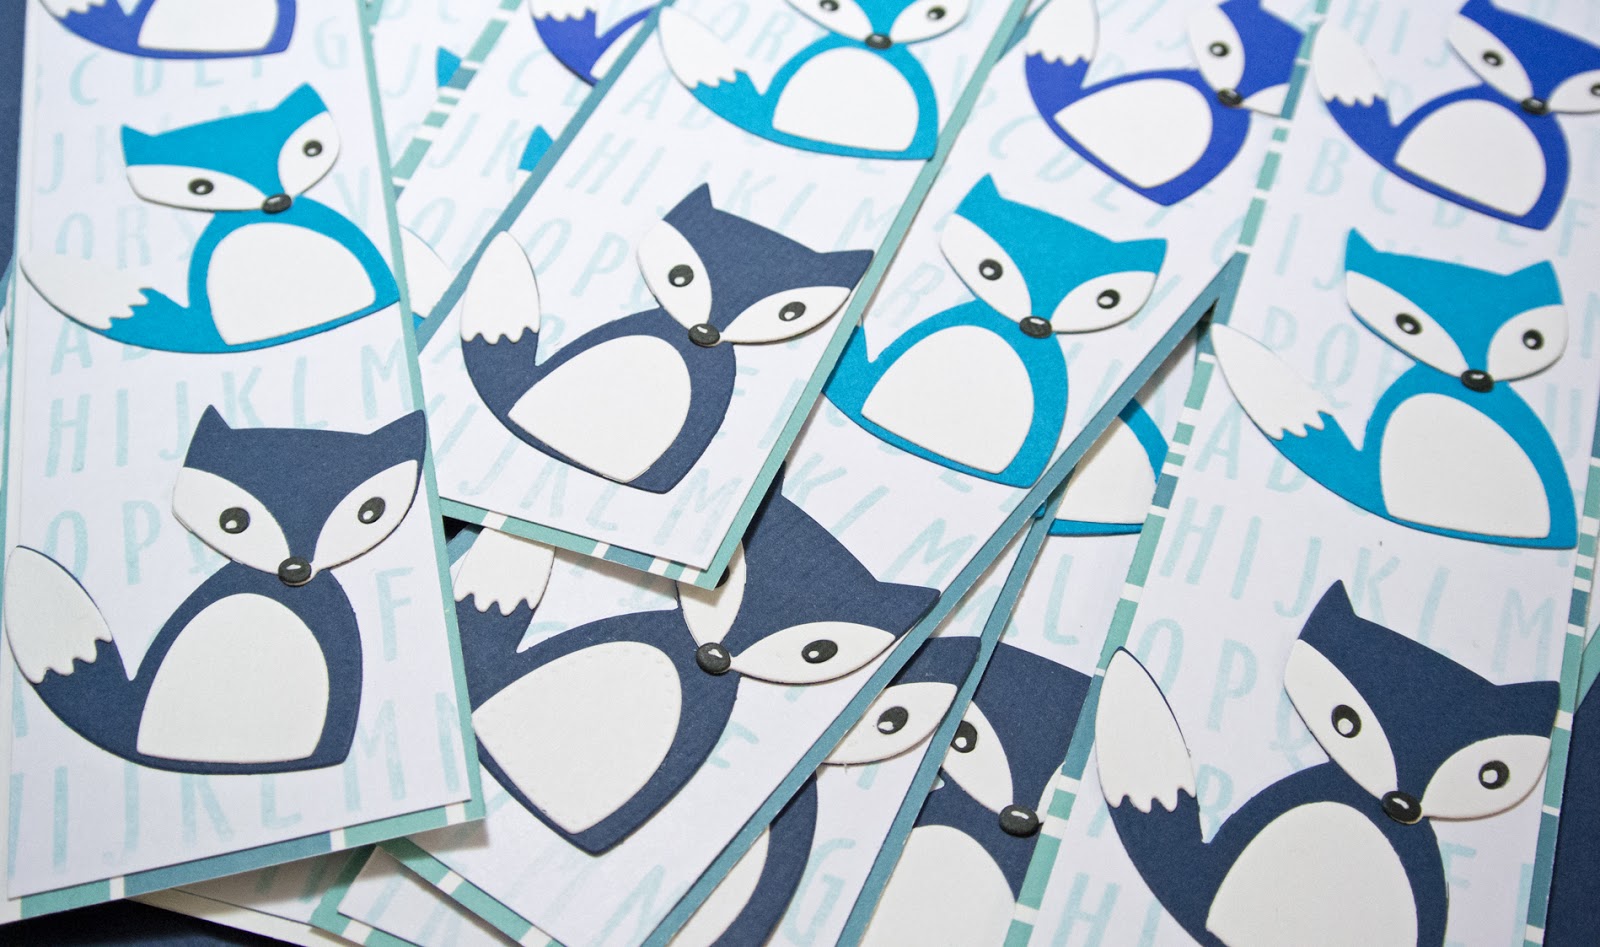
Sizzix Die-Cutting Fun: Quick and simple gift for a friend


Hi!

When kids are hosting a birthday party it has become a habit that they give small gifts for the visitors at the end of the party. Some years I chose the easy way and went to the store to buy something to put in little gift bags; pens, stickers, candy boxes and such. The only problem is that you don't want to spend too much money on the gifts, but rather spend it on the party itself. And with an euro or two you don't get too much to put in the gift bags anyway!


One year we made hero lollipops (view the pictures and related blog post here), and for another birthday party we made little bracelets from colourful wooden pearls. Those personalized hand-made items were a big hit, and when my daughter had her birthday party this March we again decided to make the gifts ourselves.


Die-cut foxes on a bookmark. Dies by Sizzix / Craft Asylum

Hei!
Nykyään on tapana, että synttärijuhlien päätteeksi annetaan vieraille pieniä lahjoja. Vaikka askartelijan lapsen synttäreillä kaiken voisi kuvitella olevan itsetehtyä, olen monena vuonna vain kävellyt kauppaan ja hankkinut vieraslahjoiksi kyniä, tarroja ja karkkirasioita, joita on annettu vieraille pienissä lahjapusseissa. Vieraslahjat ovat usein tuottaneet todellista päänvaivaa: Lahjoihin ei haluaisi käyttää kovin paljoa rahaa, ja jos budjetin laittaa kovin pieneksi huomaa nopeasti, ettei parilla eurolla saa hankittua oikein minkäänlaista kivaa lahjaa. Tästä syystä luovuin parina vuotena lahjojen ostamisesta, ja teimme lahjat itse: Yhtenä vuonna pienen pojan vieraat saivat mukaansa sankaritikkareita (katso juttu täältä), ja toisena vuonna askartelimme tyttöporukalle puuhelmistä rannekorut. Lahjojen arvo ei kummallakaan kerralla ollut suuri, mutta itsetehtyinä, vähän erilaisina lahjoina ne tuntuivat osuvan nappiin. Siksi päätin, että kevään synttärijuhlissa vieraita kiitettäisiin jälleen itse tehdyllä pienellä lahjalla.
Tällä kerralla kyseessä oli joukko 8-9 -vuotiaita tyttöjä, jotka ovat todellisessa lukutoukkaiässä. Itse askarreltu kirjanmerkki olisi siksi mitä osuvin lahja heille!


The party guests were a group of 8-9 year old girls who all loved to read a lot. So I thought the perfect gift would be a hand-made bookmark! For a dozen of bookmarks I needed
* a few sheets of white cardstock for bookmark front
* two 12" sheets of patterned paper for bookmark back
* pieces of blue, (in 3 shades), white and black cardstock for the die-cut foxes
* letter stamps and light blue stamping ink
* Two-sided tape, glue
* Sizzix / Craft Asylum 'Friendly Fox' die set

The size of a bookmark was 6 cm x 22 cm (2,4" x 8,7"), so one 12" sheet was enough for six bookmarks.

Kahdentoista 6 x 22 cm kokoisen kirjanmerkin tekemiseen ei paljoa materiaalia tarvittu:
* muutama arkki valkoista kartonkia kirjanmerkin etupuoleen

* kaksi kuvioitua, 12" kartonkiarkkia kirjanmerkin taustaan (yhdestä arkista riitti kuuteen kirjanmerkkipohjaan)
* kolmensävyistä sinistä kartonkia, pieniä paloja mustaa ja valkoista kartonkia kettukoristeisiin
* kirjainleimasimia ja vaaleansinistä leimasinmustetta
* kakispuoleista teippiä ja liimaa
* Sizzix / Craft Asylum -stanssisetti 'Friendly Fox'

Die-cut foxes on a bookmark. Dies by Sizzix / Craft Asylum


I started with cutting the bookmark front panels from white cardstock and decorating them with letter stamps. The size of the white panel was slightly smaller than the bookmark base, leaving a half-centimeter border around the panel. I attached the front to the base with two-sided tape.

Aloitin leikkaamalla kirjanmerkin etupuolet valkoisesta kartongista. Suorakaiteiden koko oli vajaan sentin kapeampi ja lyhyempi kuin tausta, jolloin etupaneelin ympärille jäi noin puolen sentin kehys.


The next step was die-cutting and assembling the foxes. They were all so super cute! I was really happy about the quality of the new Craft Asylum die set: the dies cut also the smallest pieces without issues, and removing the die-cut pieces from the die did not take too much effort.

Seuraavaksi stanssasin ja kokosin ketut. Miten suloisia ne kaikki olivatkaan! Stanssaaminen oli helppoa, sillä ohut metallistanssi leikkasi kartonkia vaivatta, ja leike irtosi helposti stanssista.

Die-cut foxes. Dies by Sizzix / Craft Asylum

Once all the 36 foxes were ready the only thing left was to glue them on the bookmark front. First I thought I would cover the bookmark with some sticky-backed plastic, but then decided to leave it. The foxes sat firmly on the bookmark front, so they would not drop off even in the hands of the most active reader.

Kun kaikki 36 kettua olivat valmiina, liimasin ne kirjanmerkkiin. Ensin ajattelin päällystäväni kirjanmerkit kontaktimuovilla, mutta luovuin ajatuksesta - lopputuloksesta ei olisi tullut yhtä kaunis kuin ilman muovia. Sitäpaitsi ketut tuntuivat olevan hyvin kiinni alustassa, joten ei ollut vaaraa, että jonkun ketun reuna olisi alkanut repsottamaan ahkeran lukijan käsissä.

Die-cut foxes. Dies by Sizzix / Craft Asylum


Once finished I wrapped each bookmark in simple white office paper and stamped a little Thank you! note on the package.


Looking at the cute little foxes I guess it's unnecessary to say that all the girls loved their bookmarks! lol!

Valmiit kirjanmerkit kiedoin yksinkertaiseen toimistopaperiin, ja leimasin pienen kiitosviestin paketin päälle.
Uskotteko, että tytöt olivat kirjanmerkeistä mielissään!


This cute little fox is from Craft Asylum / Sizzix collection - are you already familiar with the Craft Asylum brand? It's is a continuously growing collection of Sizzix dies, papers, stamps and embellishments that are all designed to work very well together. Beautiful, timeless designs, good quality and reasonable prices - a combination that all crafters are looking for when selecting their tools and supplies!


If you want to see the entire Craft Asylum collection please follow this link. For viewing what Craft Asylum offers for die-cutters please follow this link. I would love to hear in the comments which of the designs is your favourite!

Pieni kettu on osa Craft Asylum sarjaa, joka on jatkuvasti kasvava kokoelma kuviopapereita, leimasimia, stansseja ja koristeita. Sarjan pääajatuksena on ollut luoda tuotteita, jotka sopivat vaivatta yhteen, joiden laatu on korkea, mutta hinta kohdallaan. Juuri sitä, mitä askartelijat tarvikkeiltaan toivovat!
Jos haluat nähdä koko Craft Asylum -tuoteperheen, klikkaa tätä linkkiä. Jos haluat katsella Sizzixin Craft Asylum -stanssien kokoelmaa, klikkaa tätä linkkiä. Olisi mahtava kuulla, mikä kokoelman stansseista on sinun suosikkisi!
Mukavaa viikon jatkoa,

Hugs,
post signature

Colourful card for a friend


Hi!

Isn't it great to spot little hints of spring; first crocuses blooming in the garden, buds on trees growing and slowly opening, flies warming up in sunny spots on the terrace... It feels that I have so much more energy than a few months back! Must be the increasing amount of light, warmth and colours ♥.

Maybe it's the awakening nature and all the amazing blooming colours that have inspired the Craft Stamper Take It Make It Design team, too. You can tell this by all the gorgeous flower cards the team has put up for your inspiration. The theme for the April challenge is 'Colour'. For viewing the challenge rules, our amazing sponsor prize by IndigoBlu and the first lot of vivid and colourful projects, please follow this link.

Here's my colourful inspiration card:


The starting point for this project was a chipboard branch by Wycinanka I found in my stash. I inked the stem green, and painted the flowers with gold Glimmer Glaze; those gold painted dots became the centers of my flowers.
For the flowers I stamped dot circles on red cardstock, heat embossed them using bronze embossing powder, and cut out. The leaves are cut from a folded pieces of green cardstock.


The brown colour of burlap looked too boring for my project, and I coloured a piece of it with red and brown mists. Once dry I used gel medium for gluing it down on my card front. Card backgound is inked and decorated with a texture stamp.

The sentiment is die-cut twice; the dark red copy acts as a shadow for the white one, and makes the white title pop from the background. Easy but effective technique for die-cut sentiments!
The die is a brand new 'Happiness Phrases' from Sizzix / Craft Asylum collection. Love it!


I hope your week will be blooming! ♥
And I hope you'll find time for some crafting projects, too. Let the colours shine!

Hugs,
post signature

Stencil fun - for Paperilla blog

Hi!

I love stencils. I'm one of those crafters who thinks that you cannot have too many stencils. I have quite a nice collection of stencils and masks from various designers; different kinds of designs for different kinds of occasions. I don't have just one favourite brand nor one favourite designer, and in many cases I like to mix and match i.e. use stencils from several companies for one project. 

For this below card I used a lovely leaf stencil from Donna Downey collection. This card was very quick and simple to make, and it did not require many special tools nor supplies: Just a leaf stencil, green stamping inks, texture stamp, and some leftover pieces of flower patterned paper. Instead of using a ready made stencil I could have die-cut the leaf stencil using my favourite Sizzix leaf die 'Garden Greens' from a piece of foil or leftover packing material. With the self-made stencil the result would have been just as nice!


The leaves on the card background were stencilled using green Distress ink. The stencil had three leaf patterns next to each other, and for making the inking task easier I covered parts of the stencil with masking tape. For this I suggest you use some low-quality masking tape that does not cling too heavily on your stencil; you don't want to break the stencil when removing the tape!


For creating a mirrored leaf pattern I first inked one stem, then cleaned the mask, and turned it around for inking the other half of the design. After inking I stamped some random texts on the leaves through the stencil for creating more details on the card.

The finishing touches were done with black acrylic paint: I mixed a drop of paint with water and splashed small dots on the card.


The flowers are fussy cut from a leftover paper piece that had flowers on it. Before gluing the flowers down on the card front I pressed the flower petals with a stylus. This created a nice a 3D look for the flowers.


I mat the card front on a piece of dark red cardstock, and trimmed around the edges leaving 1-2 mm border the card front.

For this card I simply draw the sentiment text on the card front, using a black marker. Stamping the greeting text would have been an option too, but this time I thought the hand-written text was just perfect for this project.


Wishing you a great week!
Hugs,
post signature

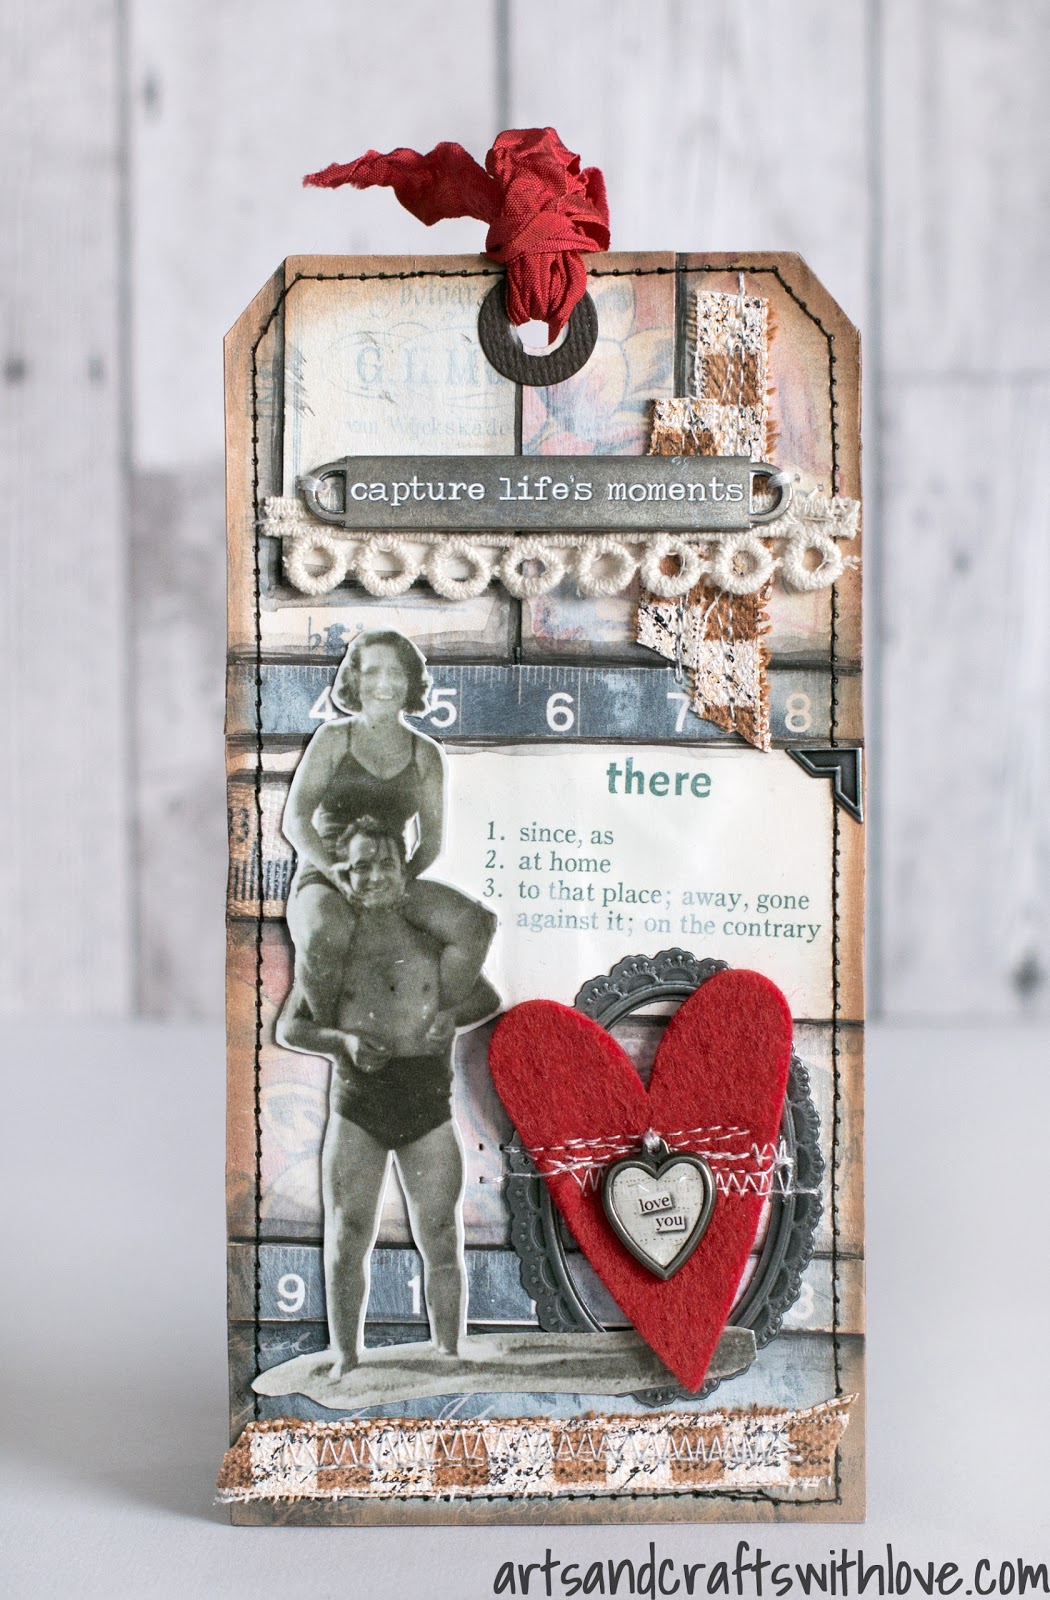
12 Tags of 2015: April

Hi,
Hope you had a nice Easter. I was fully enjoying the relaxing long weekend, and was so happy to find some time for papercrafting, too. After making a few 12" layouts in a row it was nice to work on something quite small for a change. Yes, this weekend was all about tags!

Tim Holtz tutorial post for April introduced again a different style. After watching the tutorial I had to grab my stamps, Distress markers, and a few pieces of watercolour paper and get going. And loved every minute of the creative process!!

On the tutorial post Tim made two tags, so I decided to do two, too. For the first one I used warm summer colors, and for the second colder color tones. I like how the two tags have quite a different look and feel, even if they are made using the same 'recipe'!


Even if I did not have many of the suggested supplies to work with, I still think that I was able to interpret the April tag theme pretty well. I loved the new flower stamps by Tim Holtz, but as I did not have them, I used an older set by Stampin' Up. In that 'Secret Garden' set the flowers and stems were separate stamps (as in Tim's 'Flower Garden' set), which gave me more possibilities for the flower placement. However, instead of using the stem stamp I decided to hand draw the stems; masking the crossing stems would have been too much of an effort for me :D ...


Another supply I did not have was the block stencil that was used for the tag background. So I had to get inventive and use my Silhouette. That's why my font and the font size are different from the original tutorial tags.


For the die-cut sentiment text I used another Sizzix text die set I had (follow the link for more info). It's a new Tim Holtz design, so I thought it was just as perfect for my April tags.

The tag background is not a size 8 craft tag, but I decided to die-cut them myself. That way I was able to match the tag color to the Distress marker colors I had used. For cutting the tags I used this Sizzix tag die, and brown and green papers from Tim's 'Retro Grunge' paper stack.


I ended up spending quite a long time on finishing the tags. More than I originally planned to. But I love how the tags came out, and I really had fun making them. That creative pleasure once again reminded me of what this cool hobby is all about: Turning a few pieces of paper to something tangible and beautiful, to something that makes me happy.

I hope you'll share the same feeling when making your next project!

Hugs,
post signature

Layout for Allt Om Scrap: Today is a gift


Hi and happy Sunday!
It's time for Allt Om Scrap April challenge!
This month we are given this below picture to kick of our inspiration, and the task is to use the picture for color palette. Cool!


I use dark blue very seldom, so I decided to challenge myself and use it as my layout background. Furthermore, the idea was to use green Chartreuse Iridescent Creative Medium by Imagine Crafts; a soft and creamy texture paint I got from CHA to play with. The amazing idea with this product is that the paste changes its colour: When used on dark surface you'll see beautiful, shiny, bold colours, but when used on white (the paste is white itself), it will give only a soft, pearly shimmer. Cool!!

Here's my take on the challenge:


I applied the creative medium simply with an old bonus card. The stripes on the background are made using an old fork before the creative medium was dry.


After applying the green creative medium I added some patterns on the sides with Pan Pastels. For fixing the loose green Pan Pastel pigment on the layout I used some cheap hairspray (works much better than most of the expensive fixatives!).


Isn't the green shimmer gorgeous!


The turquoise feathers are cut out from an old foil sheet from Hambly. Oh I wish those great designs would still be available! Attaching transparent elements on a layout is always a bit tricky as you don't want the glue nor tape to show through. This time I tried using gel medium as glue, and I think it worked perfectly!

There's a beautiful spring themed prize to be won for one lucky challenge participant. Linky tool for uploading your project is in the reveal blog post. I'm hoping to see your project among the entries!


Wishing you a great and inspirational Easter Sunday!
Hugs,
post signature

Scrapbooking layout: True love

Hi!
Hope you are having a nice Easter weekend. Among spending time with my kids and hunting for chocolate easter eggs I was so happy to find time to organize my crafting room; that's a task I had been postponing for too long already, and after my supplies had started wandering from my messy room to our kitchen table I realized that I had to do something about it. I'm hoping that after this weekend things are back on their places again, and who knows, maybe I could share some pictures of my own 'paper arts chamber' with you!

Last weekend I had some time for scrapbooking. Boy had I needed that! I strongly believe scrapbooking and other paper crafts are the best cure for keeping work stress away. Recently I have been so busy that stress has really been peeping just around the corner. After dedicating an evening for my favourite hobby I felt so much better. Yes, can warmly recommend this to everyone!

When your mind is going around work related issues, the quickest thing to get the inspirational juices flowing is to use a challenge task or a sketch as the project starting point. That's what I did: I took CSI case #158 as I loved the suggested soft and beautiful colours:


And here's what I came up with:

Scrapbooking layout with mixed media elements and lots of layers

 The cute animals are designs by SODAlicious. ♥♥!!


Scrapbooking layout with mixed media elements and lots of layers

I started the layout with white washing a section of the light blue background. For that I used simple white gesso. I wanted to get the section lines clear and crispy, so I used masking tape for covering the edges of the painted area.
Once dry I created some heart textures with texture paste and a stencil. I covered parts of the stencil with masking tape as I wanted to create a random pattern. Sure playing with masking tape was not necessary; I could have simply been more careful when spreading the paste. But using the masking tape made the task so much easier!


When the texture paste was still wet I sprinkled purple micro beads on the hearts. Loved the result! Even though texture paste would have fixed the beads I still decided to seal the hearts with a thin layer of gel medium. Now none of the beads will fall off!

Texture paste with micro beads

What a great project to make! The picture I used is from a few years back. It's one of my favorites, showing the strong bond between those two ♥.


Scrapbooking layout with mixed media elements and lots of layers

Wishing you a nice day! Thanks for stopping by in my blog!
Hugs,
post signature