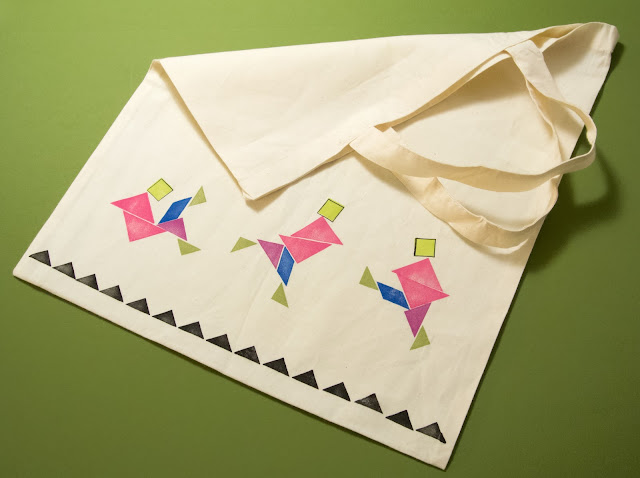
Chinese puzzle on a canvas tote


Hi!
Today in Imagine blog I'm showing an easy way to decorate a simple canvas tote bag. Just take your favourite stamps and vibrant Memento Luxe inks and off you go!

Are you familiar with ’Tangram’? It’s a Chinese puzzle consisting of seven flat shapes, called tans, which are put together to form specific shapes. I got my Tangram book and tiles set from my mother when I was a little kid, and yet today those black geometric puzzle pieces keep inspiring me. This time I did not play with the puzzle itself but instead used a Tangram stamp set (by Altenew) to decorate a plain canvas tote bag. Stamping on fabric is as easy as it is on paper; just remember to iron the fabric first, and to use stamping inks suitable for fabric. Memento Luxe pigment inks are the perfect choice for all fabric projects.


 For keeping the fabric flat, I suggest placing a piece of cardboard underneath the fabric. Especially when using thin fabrics, a sheet of cardboard inside the tote (or a T-shirt) will block the stamping ink from blotting and messing the fabric layers underneath.
Once the ink is dry the stamped image is heat set with ironing. Then the colors will remain vibrant even if repeatedly washed.


Wishing you a wonderful week!
Hugs,


Bright beginning for 2017

Hi!
Since beginning of January I've had the great pleasure to be part of Imagine Artist In Residence team. And for highlighting the start of this great year I made a pair of decorated candles:


For decorating the candles you need some tissue paper, your favourite stamps, paints or markers, and a heat gun. I colored the stamped flowers with my favourite colors, Tsukineko All-Purpose Inks, the tiny bottles of truly powerful colour!

I made a step-by-step photo tutorial for this project, so hop over to *Imagine blog* to read the instructions.

Hope this year will be filled with beauty and light for you and me!
Hugs,
post signature

Soul music ATC trio

Hi!
Artist trading cards (ATC) provide the perfect size for a miniature collage. One could think that creating a small ATC would take much less time than making a standard sized card, but often that's not the case for me. When there isn't too much space to play around I tend to spend more time on the card design and on selecting just the right elements for my project; the card must not get too busy but then again it should not be too simplified, empty nor boring.

When I have collected the elements for my collage project I may realize that I'm not able fit all the planned fun things on a single ATC. The solution is to create a series of ATC's, in which the cards are connected to the ATC set by a common theme, technique and/or colour palette.


When creating these musical ATC's I first stamped and heat embossed the B&W main images. The images were too big to fit on one or even two cards so I made three backgrounds with Distress paints. I decorated the backgrounds with white acrylic paint dots and stamped music patterns, and before gluing down the main images I attached the colourful backgrounds on white ATC card bases (size 2,5"x3,5").
 
 
I really like my ATC trio! The cards are similar but yet unique :)


Here are pictures of the Visible Image products I used (click on the pictures for more info):


Wishing you a wonderful week!

post signature

Layered flower card for January TIMI challenge

Hi!
Hope you have had time to participate in our Craft Stamper January Take It Make It challenge. The task was simple: "Anything goes", as long as stamping is used somewhere on ther project. And again there's a great prize to be won; one randomly chosen winner will get a fun Rubber Dance stamp set, and the Design Team favourite will get the design prize, which consists of publication in Craft Stamper Magazine, a GDT slot for an upcoming challenge, and a winners profile. All key challenge info can be read here, and the gorgeous entries of our TIMI design team can be viewed here and here. I'm sure those projects will get your inspirational juices flowing!

My second January project is a layered flower card:


The lovely flower stamps are from Altenew, and they are cut out using the matching Altenew dies. Green and white leaves are cut with Sizzix dies, as well as the background ellipse. For the 'Hello' word I used a die from Studio Calico.


I wish you an inspiring day!
Hugs,
post signature

Playing with colour!

Hi!
Last week Helen and Mark, the lovely and super talented couple behind Visible Image revealed the design team for year 2017. I'm so happy and proud to be part of this hearfelt team, and I know already now that our new year will be AMAZING!


There are so many gorgeous goodies coming up, so I suggest you sign up to Visible Image Newsletter to make sure you don't miss any news, special offers and new releases. You can also follow Visible Image on Facebook, Instagram, Pinterest and Twitter!

This week I wanted to show you two colourful tags I made using stamps from 'Jazz It Up' and 'Rays Of Light' sets. The background is a simple size 8 manila tag, coloured with yellow, blue and green Brushos. Brushos are very intense paint powders that produce brilliant vibrant colours when mixed with water. This time I did not sprinkle the powder directly on wet paper, but first misted by crafting mat with water, sprinkled brushos on the water drops, and picked up the colour with a dry tag. The nice thing about Brushos is that like watercolours they are pretty unpredictable, so you cannot fully control the flow of colours. That's what makes the creative process so much fun!


The Brusho colours did not cover my backgrounds completely, so once completely dry I inked the tags with yellow Distress ink. Then I used a green ink to stamp random circles on the bottom of the tag, and heat-embossed the trumpet player on the tag using black embossing powder.


Black splatters are made with thick embossing powder I just sprinkled on the tag. For attaching the loose powder I heated the tag from underneath.
Yellow and turquoise seed beads are simply glued down on the tag, and white splatters are made with acrylic paint.


I love the contrast between the black image and the colourful background. When using bright colours I always like to add both white and black to the project; they really make the bright colours pop!


For more information on the Visible Image circle stamps I used please click on the pictures below:


Wishing you a wonderful week,
Hugs,

post signature

Card for January TIMI Challenge: Empowering words

Hi!

January has started, and it's time to kick off this year's first Craft Stamper Take It Make It challenge.
'Anything Goes', so entering could not be easier. Just remember to use stamping somewhere on your project.

Our generous January sponsor Rubber Dance has put up a great prize for one lucky winner:

This is the stamp plate you can see featured on the cover of the February issue of the Craft Stamper magazine. Cool prize, isn't it!


My stamped January project is a mixed media card with purple and blue colours:


Isn't that Carabelle Studio stamp just gorgeous! The sentiment text is from a Stampers Anonymous/Tim Holtz set from a while back.
For the card background I used heavy semi-glossy paper (the simple office quality I like to use), and painted it with various purple and dark blue Distress Paints. Once dry I white washed the entire background with acrylic paint; I used a brayer to apply a very thin layer of white paint.
Then I decorated the background with a texture stamp (Andy Skinner stamp by Stampendous), and glued down a piece of gauze with gel medium.
Even though I liked the colourful background I realized that my stamped image was almost blending into the background, and white washing is a simple way to highlight the main image. I think that worked well for this project.

For colouring the image I used my Promarkers.


I hope you get inspired and play along our January challenge. There's plenty of time to enter; the challenge closes on January 25.

I'm happy you stopped by. Wishing you a wonderful weekend!
Hugs,
post signature

Watercolor Flowers On Mint Green Water + Video

Hi and Happy New Year!
What a way to start the new year. I'm so happy and honored to be part of the 2017 Imagine Artist in Residence team; an amazing team of truly inspiring, great talents.

My first project is now published in Imagine blog, please follow this link to read the post.


Our January color theme was light wintergreen, and I used it for creating watercolor effects on a textured background, and for painting a stamped flower in watercolor style.


When painting the flower I recorded a little video of the technique I used. Here it is:


In addition I made an ATC card using the same techniques:


The Creative Medium Shimmer resisted the watercolors, but also added a beautiful light shimmer on the background. Loved it!

Make sure you won't miss any inspiration posts on Imagine blog. New projects are showcased every day, here are the social media links for you:

Wishing you a wonderful day!
Hugs,