Cool Yule Christmas cards


Cool Yule Christmas Cards with Sizzix Thinlits dies

Hi!

Sharing with you a set of Christmas cards I made with the cute 'Cool Yule' Tim Holtz/Sizzix Thinlits die set. The main images I had cut and put together already a while back, and for finishing the cards quickly I created simple backgrounds by layering some die-cut and ink-splashed elements. Utilized also the die-cut leftovers: on the below card I used the positive oval shape and on the above card the striped negative.

Cool Yule Christmas Cards with Sizzix Thinlits dies

Finnish word 'Jouluiloa' means 'Christmas joy'.

Hopefully your Christmas will be a joyful one despite of the lockdowns, travel restrictions and social distancing. 

Cool Yule Christmas Cards with Sizzix Thinlits dies

Cool Yule Christmas Cards with Sizzix Thinlits dies

Wishing you a wonderful day! Thanks for stopping by in my blog!


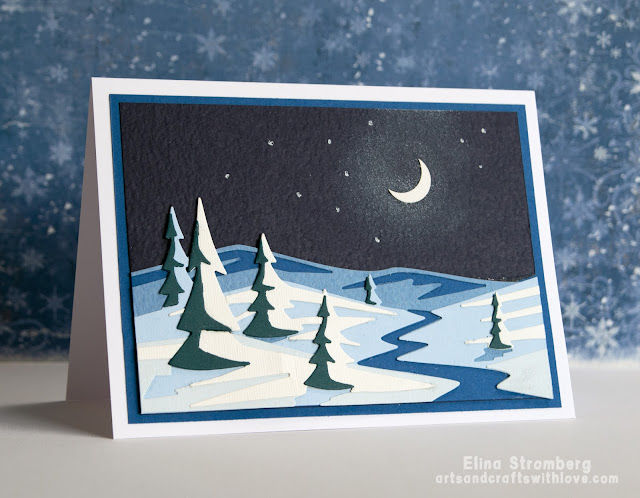
Winter scenery cards for Christmas


Hi and happy Sunday!

Every year I plan to create my Christmas cards early enough, and every year I end up making them on the very last minute. Well, not this year!

Maybe it is the 'new normal' that apparently gives me more free time on evenings and impacts also my cardmaking routines 😀. My cards were ready already a while back, so today I'll just write the addresses on the envelopes and drop the cards in the mailbox. 10 days before Christmas! Woohoo!

Here are two card designs I made. Using the beautiful Tim Holtz/Sizzix Thinlits Die set 'Snowscape Colorize' I made two versions of the same winter scenery. One in daylight and one in night.

Quite a different look by just changing the cardstock colours!

The layered scenery was easy to put together, as the dies hold the instructions on the backside. Numbers in the dies indicate in which order the layers are to be stacked. Simple and fun!

Wishing you a wonderful day. Thanks for stopping by!


Cross-stitch Christmas cards in Scandinavian style


Hello my Crafty Friend,

Last weekend I took out my Cross-stitch Rectangle Die-namics die (MFT-1288) and decided to use it for Christmas cards. I browsed through Pinterest boards looking for patterns I could use for my cards, but as I wanted the design to fit perfectly on the die-cut panel I ended up designing the pattern myself. 

The die-cut grid has a cross-stitch count of 25 x 35 which allowed me to design a simple symmetrical pattern in Scandinavian style. I'm so happy with the design!


For stitching I used three strings of embroidery yarn. Three strings did not make the tiny crosses too bulky, but yet covered the background color nicely. While stitching I put my headset on and listened to a good audio book. Time flew by and I finished both cards in a few hours.


My Favorite Things has published many wonderful cross stitch designs to be used with this die-cut panel. You can find them in their blog *here*

I also wanted to share with you my design pattern; feel free to use it for your projects!
The grey squares mark the center of the grid (both horizontal and vertical)

Happy stitching! Hope you like my cards and the cross-stitch pattern!

Scrapbooking layout: Beautiful moments

Hi and happy Friday!

Scrapbooking is one way to keep the spirits high during these exceptional times. I took out pictures from last summer and let my mind travel back to a lovely sunny afternoon in July. On that day I had a chance to do some nearby sightseeing with my family, and we visited fun places we had wanted to check out. Finally there was time to do such things!

To decorate the background I fuzzy cut a brick wall pattern from a patterned paper, and glued it on another paper with soft earthtone watercolor patterns. To blend the pattern into the background I added watercolours and stamped patterns. 

The picture is layered; I fuzzy cut the selfie and attached it with foam stickers on a picture copy. Underneath there are tags of different sizes.


For the white branches I used the 'Doodle Blooms' stamp&die-set by Altenew.


Wishing you a wonderful weekend. Thanks for stopping by!


Scrapbooking layout: The world needs you


Scrapbooking layout: The world needs you

Hi and happy Saturday,

After creating a series of grungy layouts with lots of texture it was time to do something in different style again. However, I soon realized that the blooming scrapbook page was still reflecting the moods of the previous pages: boldness, richness, and friskiness. Self-confidence and delight. More was still more!

Scrapbooking layout: The world needs you

All patterned papers are from 'Diary' kit by ABstudio: the cool red background. black and white stripes and beautiful large flowers that I fussy cut from a 12" paper. I used a white charcoal pencil to add more light to the petals of the flowers.

Scrapbooking layout: The world needs you

As last step I added some small wood veneer embellishments and text patterned confetti dots. 

The page looks just like I hoped it would.

Scrapbooking layout: The world needs you

Wishing you a wonderful weekend! Hope you have time to do things that make you happy 💓


Scrapbooking layout: Adventure awaits


Hi!

Here's one more grungy layout I made using supplies from ABstudio 'May Day' kit. In addition to the kit papers I stamped patterns on the background, and created additional layers by gluing down dotted tissue paper and white cheesecloth. 

The black 'strings' are chipboard embellishments I coloured black with a marker. Isn't it a fun dimensional background element! 

How I love to play with layers!

I used quite many different embellishments and was just convincing myself that as long as I don't go crazy with the colours the elements will work out together. Actually the page is a collection of things I had at arm's length from my crafting table: wooden stars, punched circles, sewing  yarn, and plastic frames. I think that the page looks grungy but also playful and neat 😊

Wishing you a wonderful day. Thanks for stopping by in my blog!


Scrapbooking layout: Dream big


Hi and happy Saturday!

Sharing with you one more layout I made a week ago, using papers from 'May Day' collection by ABstudio. The grungy designs by amazingly talented Mima Molina continue to inspire me 😊

The paper kit included a sheet of tags to cut out, and I used three of them for this page. I continued the machine sewn pattern printed on the paper, and sew straight stitches and zig zag on the tags and on the background paper. Following the paper's grungy style I created the two largest tags myself: For colouring and decorating the paper I used acrylic paints, my gelli plate and ABstudio/Mima Molina stencils. For cutting the tags I used my Bigshot and Sizzix/Tim Holtz tag dies.

The photo has two layers: I cut out the silhouette, glued a piece of corrugated cardboard underneath, and layered on the second copy of the same photo. I'm so fond of the dimensional look this simple trick creates!

In addition to the decorated tags there's tissue paper and stamped patterns on the page background. I did not trim the ends of the black sewing thread but glued them on the page using small dots of liquid glue. Here and there I secured the thread using old white, pink and black vinyl stickers.

This page was super fun to make. And I'm so happy how it turned out!

Thanks for stopping by in my blog!
Stay safe,


Scrapbooking layout: Be brave with your life


Scrapbooking layout: Brave with your life
Hi!

Today I'm sharing you another 12"x12" layout I finished during my creative weekend last week 😊 . This cheerful and lively page is getting its energy from the bold bright yellow colors, combined with grungy black and white textures and patterns. Isn't this paper by ABstudio / Mima Molina amazing!

Scrapbooking layout: Brave with your life

The paper looked very cool even without adding anything, but I ended up layering more grungy stuff on the page: Ripped cheesecloth, very old vinyl number stickers (leftovers from an old AC letter sticker set), more patterned papers, machine-sewn zig zag stitches, stamped patterns and wood veneer stars I colored black with my Promarkers. Loved every creative moment I spent on this page!

Scrapbooking layout: Brave with your life

This photo of my dear son is one of my recent favorites. The simple light background on the photo created a calming contrast to the busy colourful background. Usually I use black and white photos on a colourful background, but this time even the colour photo worked nicely.


 Hope you like this page; it's quite different from the pages I have done earlier this summer! 😀

Thank you for stopping by in my blog,

Elina Stromberg

Scrapbooking layout: Focus on the good


Scrapbooking layout: Focus on the good

Hi!

Last weekend was a productive scrapbooking weekend: I was super excited about the new papers that I had purchased from ABstudio, and had waited impatiently the entire week to start playing with them. Especially the 'May Day' paper kit designed by  Mima Molina truly got my creative juices flowing; it has been a while since I have been so very inspired by new supplies!

Scrapbooking layout: Focus on the good

The papers are filled with bright colors and bold textures. On this layout I decided to continue the textures that were printed on the paper and decorated the background with stencilled and stamped patterns, some grungy paper scraps, washi tape, machine sewn stitches and a piece of ripped cheesecloth.

More was more!

Scrapbooking layout: Focus on the good

This layout was a boost of energy for me. After a series of cute pages with flowers and soft colors it was a fun to step into a quite different direction. This page is filled with courage, roughness, satisfaction and pure joy.

Hope you like it, too!

Scrapbooking layout: Focus on the good

What has inspired you recently? Any new discoveries that have boosted your creativity?

Thanks for stopping by in my blog 💓

Wishing you a wonderful day,

Elina Stromberg


Alice in Wonderland: Layout and art journal page


Art journal page: Alice in Wonderland. With VivalasvegaStamps!

Hi!

When I was a young kid I read the novel Alice’s Adventures in Wonderland by Lewis Carrol many times, but I was never a huge fan of the surreal story. Sure the story was intriguing, but also somewhat strange and difficult to understand.

Now as an adult I feel that I've discovered the novel again. The storyline is quite unique, but underneath the fictive tale there are many amazing quotes, thoughts and sentiments. 

Tweedledum and Tweedledee on art journal page

As much as I love the colourful images and scenery of Tim Burtons Alice films in 2010 and 2016, I also like the original artwork of the 'Alice in Wonderland' characters: I believe that the book I used to read as a kid was decorated with the bit bizarre illustrations by John Tenniel. Those drawings were quite an unique addition to the twisting story!

Alice in Wonderland image by John Tenniel / Vivalasvegastamps!

A while back I had a pleasure to cooperate with one a great stamp manuifacturer, VivalasvegaStamps! .
I was so happy to discover that a set of lovely 'Alice in Wonderland' images by John Tenniel were available as stamps; yes, exactly those characters from my childhood.

Alice in wonderland. Stamps by Vivalasvegastamps!

I love playing with those characters on my paper crafting projects. Here are two samples of how I used the coloured and fuzzy cut images: One 12" scrapbooking page and a small 18 cm x 14 cm art journal spread. I think that the picture I took in Singapore three summers ago was matching the stamped images perfectly - Alice in Wonderland themed exhibition in Flower Dome.

Alice in wonderland scrapbooking page

Alice in wonderland scrapbooking layout closeup

Aren't these characters just amazing. Can you imagine that the illustrations by Mr Tenniel are already 150 years old?

Alice in wonderland. Queen of hearts

Alice in Wonderland. Mad hatter

Has Alice in Wonderland played a role in your childhood? Do you remember these drawings from your own book?

Thanks for stopping by. Hope you have time to leave a comment!

Hugs,